Z9Works Inc.
Z9Works Inc.
  • Home
  • Dynamics Business Central
    • Dynamics BC/NAV Services
    • Why Business Central?
    • AI and Copilot
    • Implementation Services
    • Consulting/Customization
    • Migration & Upgrades
    • Pricing and Licensing
    • Our Partners
  • What is new in BC 27.0
    • What is new in BC 27.0
    • Copilot and E-Commerce
    • Financial Management
    • Reporting and Analysis
    • Sustainability Management
    • Supply Chain Management
    • Electronic Documents
  • Advisory Services
    • Digital Advisory Services
    • Analytics & Reporting
  • Contact Us
  • Careers
  • Social Responsibility

New Features in Copilot and E-Commerce for BC 27.0

Copilot and E-Commerce

 Business Central 27.0 (also referred to as the 2025 Release Wave 2 or BC27), available October 2025, represents Microsoft’s latest evolution of its ERP solution, bringing deeper AI integration, smarter search, and enhanced automation across functional areas.

 Among its highlights are new Copilot-driven capabilities — such as natural-language analysis and autofill suggestions — and an Advanced Tell Me search that leverages semantic similarity to help users find pages and reports even when they don’t recall exact names. On the financial side, it introduces support for multiple fixed-asset cards and improved excise tax handling, enhancing accuracy and flexibility. E-commerce connectivity is also refined, with smarter Shopify integration for region-specific pricing and sales attribution. 

At Z9Works, we help organizations navigate these updates — from implementation to customization — so clients can take full advantage of the new capabilities while keeping their operations running smoothly. 

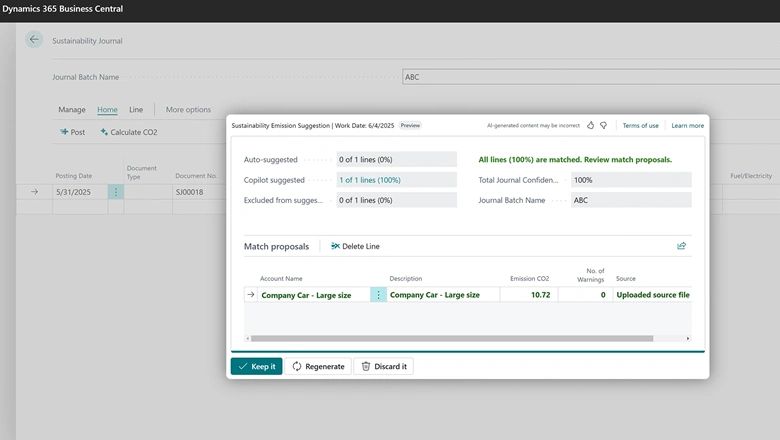
copilot and ai agents

AI-Driven Automation with Model Context Protocol (MCP)

 The Model Context Protocol (MCP) server for Business Central enables organizations to harness AI-driven automation and orchestration. By exposing Business Central entities such as customers, items, and sales orders through a standardized API, MCP makes it easy to connect with intelligent agents built on platforms like Azure OpenAI and Copilot Studio.

With MCP, businesses can:

  • Automate repetitive tasks and reduce manual work.
  • Streamline workflows with AI agents that understand ERP data.
  • Interact with Business Central using natural, conversational language.
  • Access real-time updates and insights for faster decision-making.

Because MCP is an open, self-describing standard, it simplifies integration with external systems and AI assistants. Agents gain the contextual information they need to act intelligently, while ongoing maintenance is minimized. The result is a more intuitive user experience and an ERP platform that adapts as business requirements evolve.

 For more information, go to The autonomous enterprise: How generative AI is reshaping business applications 

Smarter Search with Advanced “Tell Me”

 Finding the right page or report in Business Central can be frustrating, especially if you don’t remember the exact name. With the new AI-powered Advanced Search in Tell Me, you can quickly locate what you need and stay focused on your work.

Instead of relying only on exact text matches, Advanced Search understands the meaning behind your request. It reviews multiple page properties and related terms to give you a clear, ranked list of the most relevant results. The result: less time searching, more time getting work done.

How to use Advanced Search:

  1. Open the Tell Me search (Alt+Q) or go to the role/report explorer.
  2. Enter your keywords in the search box.
  3. Select Try Advanced.
  4. Review the list of results in the Advanced tab, and refine your search if needed.

With just a few clicks, you’ll always be able to find the right page or report, even when the exact name slips your mind.

Smarter Data Entry with Copilot Autofill

 Manually entering data is time-consuming and often leads to mistakes. Whether you’re a casual user entering a few records or a power user updating dozens of forms each day, the new Copilot Autofill feature helps you save time and improve accuracy.

Copilot suggests values for common fields, so instead of typing everything out, you can simply review and confirm the right details. This means fewer errors, faster entries, and less repetitive work.

What’s new in this release:

  • Contact details from the web – Copilot can now suggest customer or vendor information like address, phone, email, and website by searching publicly available sources.
  • More accurate suggestions – Improved reliability ensures field values are more consistent.
  • Expanded language support – Autofill will soon work in 20 additional languages. 

How to use Copilot Autofill:

  1. Make sure Bing Search is enabled by your administrator (in the Copilot & agent capabilities page).
  2. When entering a record, look for Copilot suggestions in fields such as address, phone, or email.
  3. Choose to accept the suggestion or edit it if needed.

With Copilot Autofill, data entry becomes quicker, smarter, and less error-prone — letting you focus on more meaningful work.

 For more information, see Configure Copilot and agent capabilities. 

Keep Control with Human-in-the-Loop for Agents


AI agents in Business Central can handle more and more tasks, but it’s important to keep oversight and control so workflows stay on track. The new human-in-the-loop capability makes this simple by letting you review agent activity and provide extra instructions when needed.

From the Copilot & Agents task pane, you can see exactly what each agent is working on. If an agent gets stuck — for example, it can’t find the right customer or item — you can quickly unblock it by adding guidance in the Additional instructions field. This ensures tasks continue smoothly while keeping you in control.

How to guide agents with additional instructions:

  1. Open the Copilot chat pane and select the Agent tasks tab. 
  2. Review the list of current tasks the agent is handling.
  3. In the Additional instructions field, either type your own instructions or pick from a predefined set. 
  4. Submit your update, and the agent adjusts its actions immediately. 

This feature applies to all agents in Business Central, giving you the perfect balance between automation and oversight.

Quick Insights with Copilot Record Summaries

  Reviewing detailed records like customer cards or large orders can take time and effort. The new Copilot Record Summaries feature saves you the work by providing a concise, AI-generated overview of the most important information. In just a couple of sentences, you get the insights you need to understand the data and decide on your next steps.

What’s new in this release:

  • Deeper insights on popular pages such as the Customer card.
  • Expanded language support with 20 additional languages.
  • Clearer summaries with consistent use of currency codes.
  • Agent activity highlights showing when autonomous agents have created or modified the record (coming later in the wave).

How to use record summaries:

  1. Make sure the Summarize with Copilot capability is turned on in your environment.
  2. Open a record such as a Customer or Sales Order.
  3. Look for the Copilot summary panel, which provides a short, easy-to-read overview.

With Copilot Record Summaries, you can focus on decisions instead of digging through data fields.

Smarter Sustainability Tracking with Copilot

Managing greenhouse gas (GHG) emissions data can be complex and time-consuming. With the new Copilot Sustainability feature, Business Central helps improve both accuracy and efficiency by estimating emissions directly from your entries. This means less manual calculation and more reliable results for your sustainability reporting.

What this feature does:

  • Estimates total emissions based on descriptions and input parameters.
  • Suggests emission factors and adjusts them for future use.
  • Reduces manual work and helps ensure consistency in reporting.

How to use Copilot for emissions tracking:

  1. Sign in to your Business Central online environment.
  2. Open the Sustainability Journal page.
  3. Enter sustainability accounts and fill in the Descriptions field with accurate details.
  4. Provide inbound parameters such as Fuel/Electricity, Distance, Custom Amount, Installation Multiplier, or Time Factor.
  5. Select Suggest emissions with Copilot to generate emission estimates.

With Copilot, sustainability data collection becomes faster, more accurate, and easier to manage.

Faster Insights with Copilot Analysis Assist

 Digging into data can be time-consuming, especially when setting up views and filters manually. The new Copilot Analysis Assist feature makes it simple: just describe your analysis in plain language, and Copilot builds it for you. For example, you can type “show me vendors by location sorted by amount of purchases” and instantly get the insights you need — without dozens of clicks.

This makes it easier to spot trends, identify anomalies, and take action, such as optimizing your supply chain or negotiating better vendor terms.

What’s new in this release:

  • General availability of Analysis Assist.
  • New system permission in the Copilot System Features set to manage access.
  • Smarter field selection with the ability to include fields from related tables.
  • Performance feedback when your design choices could affect speed.

How to use Analysis Assist:

  1. Make sure your user has the new Copilot System Features permission.
  2. In Business Central, open your data analysis view.
  3. Type a simple request, such as “show me top customers by revenue this year.”
  4. Review the generated analysis, refine if needed, and act on the insights.

With Copilot Analysis Assist, data analysis becomes conversational, faster, and more accessible to everyone.

For more information please see  Analyze data in lists with Copilot. 

Automate Sales Orders with AI Agents

 AI is entering a new era in the workplace, transforming tasks that once required hours of manual work. In Business Central, AI agents can now orchestrate and automate business processes on their own, stepping in to handle repetitive workloads while keeping humans in control. The first out-of-the-box agent is the Sales Order Agent, designed to automate the entire process of capturing and processing sales orders from customer emails.

By working independently under your direction, the Sales Order Agent improves efficiency, reduces costs, and frees employees to focus on higher-value tasks. It also supports transparency: every action the agent performs is visible in Business Central, and users can intervene at any point.

What the Sales Order Agent does:

  • Monitors a shared company mailbox for customer order requests.
  • Identifies the customer based on existing records in Business Central.
  • Drafts a sales quote with the requested items.
  • Checks item availability to avoid fulfillment issues.
  • Sends the sales quote to the customer for review and approval.
  • On confirmation, converts the quote into a sales order.
  • Shares the finalized order with the customer via email.

How it works behind the scenes:

  • The agent follows the instructions you define in its configuration and uses AI to determine the right steps.
  • It requests human input when required — for example, when preparing outbound communications, handling missing data, or needing approval for sensitive operations.
  • All actions are logged with the agent’s user ID, appearing in Business Central’s list views, history, posted documents, and notifications.
  • Transparency is built in: you can review the agent’s timeline, see every entity it created (quotes, orders), adjust or approve changes, or even discard steps and redirect the flow.

How to set up the Sales Order Agent:

  1. Go to the configuration page in Business Central.
  2. Define the agent name and select the shared mailbox it should monitor.
  3. Choose which process steps to include or exclude (e.g., automatic confirmation vs. manual approval).
  4. Activate the agent. An internal email processor begins monitoring the mailbox and triggering the agent automatically.
  5. Use the Copilot pane and timeline view to oversee actions, provide additional instructions, or approve key steps.

With predefined permissions and roles, the Sales Order Agent has access only to what it needs. This safeguards data while ensuring the process runs end-to-end with minimal intervention. By keeping humans in the loop when necessary, it strikes the right balance between automation, accuracy, and control.

Improved B2B Management with Shopify Connector

 Managing customers across multiple systems can be time-consuming. The enhanced Shopify Connector in Business Central makes this easier by allowing you to export customers as B2B company locations in Shopify. With support for both Sell-to and Bill-to customer fields at the company location level, businesses gain more flexibility and consistency when managing customer information across the two platforms.

What’s new in this release:

  • Two new fields — Customer No. and Bill-to Customer No. — are now available on the Shopify Company Location page, both linked to the Customer table.
  • When importing Shopify orders that include a B2B company and location, these fields are automatically mapped to the correct sell-to and bill-to customers.
  • A new Add customer as Shopify Location action makes it simple to export customers as locations (with checks to ensure they haven’t already been exported).

How to use the new Shopify connector capabilities:

  1. Go to the Shopify Company Location page in Business Central.
  2. Use the new Customer No. and Bill-to Customer No. fields to map Business Central customers to Shopify B2B locations.
  3. When importing Shopify B2B orders, confirm that the mapping has been applied automatically.
  4. To add a new customer as a Shopify location, select Add customer as Shopify Location and follow the prompts.

This update ensures smoother data flow, reduces duplication, and provides more accurate customer management between Shopify and Business Central.

Better Traceability with Shopify POS Staff Mapping

 For businesses using Shopify POS, it’s now easier to connect sales activity in Shopify with sales reporting in Business Central. By importing staff member information from Shopify and mapping it to salespersons in Business Central, you improve both traceability and performance reporting. This ensures sales documents reflect not just what was sold, but also who made the sale.

What’s new in this release:

  • Shopify staff IDs can now be mapped to Salesperson Codes in Business Central.
  • Sales documents imported from Shopify automatically include the correct salesperson.
  • Improved reporting on staff performance and accountability.

How to configure Shopify Staff Mapping:

  1. In Business Central, select the Tell Me icon (lightbulb) and search for Shopify Shops.
  2. Choose the shop where you want to set up mapping to open the Shopify Shop Card page.
  3. Select Shopify Staff Mapping.
  4. Click Refresh to import staff members from Shopify.
  5. Enter the Salesperson Code for each matching staff member in Business Central.
  6. When orders are imported, the staff ID is matched to the mapped salesperson, and the information flows directly into sales documents.

Known limitations:

  • Available for B2B stores only.
  • Salespersons can’t be exported from Business Central back to Shopify. 

This integration provides clearer insight into sales performance while keeping records consistent across both systems.

Shopify Markets: Price Synchronization

 For businesses selling across multiple markets in Shopify, Business Central now makes it easier to keep catalog prices synchronized. By connecting Shopify catalogs to Business Central, you can define pricing rules once and ensure consistent, accurate pricing across all markets.

What this feature does:

  • Syncs catalogs from Shopify into Business Central.
  • Lets you configure prices, discounts, VAT, and currency settings for each market catalog.
  • Ensures customers see the correct pricing, including full price vs. discounted price.

Key fields for configuring market catalog pricing:

  • Customer Price Group – Defines the sales price used for the catalog. If left blank, the item card price applies.
  • Customer Discount Group – Sets the discount to calculate Shopify prices. Price = discounted price, Compare at Price = full price.
  • Allow Line Disc. – Controls whether line discounts apply when calculating item prices.
  • Prices including VAT – Toggles whether VAT is included in Shopify prices.
  • VAT Business Posting Group – Defines which VAT group applies for Shopify sales.
  • Currency Code – Specifies the catalog’s currency. 

How to sync Shopify market catalogs and prices:

  1. In Business Central, go to the Shopify Market Catalogs page.
  2. Select Get Catalogs to import catalogs from Shopify.
  3. Choose the catalog entry you want to configure.
  4. Fill in the fields (price group, discount group, VAT, currency, etc.).
  5. Turn on the Sync Prices toggle.
  6. Select Sync Prices to push updates to Shopify.

This feature ensures accurate, region-specific pricing in Shopify while giving you full control of price management from within Business Central.

Faster Troubleshooting for Shopify Integration

 When issues occur between Shopify and Business Central, quick diagnosis is critical to keep operations running smoothly. The latest enhancements to the Shopify Connector improve logging and error details, making it easier to identify and resolve problems with refunds, product creation, and order synchronization.

Key improvements for troubleshooting:

  • Refund errors: If creating a credit memo from a refund fails, Business Central now shows a specific error message and the call stack in the Last Error Info page. For example, you may see that the Refund Account No. field is missing on the Shopify Shop Card page.
  • Product creation errors: When importing products, failed conversions (often caused by customizations) are flagged on the Shopify Products page. The Error Message field explains the issue, helping you fix the root cause. After resolving, you can restart the process using the Create Item action.
  • Archived sales orders: New fields are stored in archives for better traceability:
    • Shpfy Order Id and Shpfy Order No. in the Sales Header Archive table.
    • Shpfy Order Line Id and Shpfy Order No. in the Sales Line Archive table.
      These don’t display on pages directly but can be viewed via Page Inspector or table exploration for diagnosing manual adjustments that affect synchronization.
  • Order Total FactBox: A new part on the Shopify Orders page shows order totals from both Shopify and Business Central side by side, making it easier to test templates and verify consistency without opening each document.

How to troubleshoot Shopify integration issues:

  1. For refunds, check the Last Error Info page to review detailed messages and call stacks.
  2. For product imports, go to the Shopify Products page and filter for entries with the Has Error flag. Review the Error Message field, fix the cause, and restart with Create Item.
  3. Use the Order Total FactBox on Shopify Orders to quickly compare totals between Shopify and Business Central.
  4. For archived orders, use Page Inspector to review the new Shopify-specific fields when diagnosing synchronization issues.

With these improvements, resolving integration problems takes less time, ensuring a more reliable connection between Shopify and Business Central.

  • Dynamics BC/NAV Services
  • Digital Advisory Services
  • Analytics & Reporting
  • Contact Us
  • Careers

Z9Works Inc.

Copyright © 2025 Z9Works Inc. - All Rights Reserved.

Powered by

This website uses cookies.

We use cookies to analyze website traffic and optimize your website experience. By accepting our use of cookies, your data will be aggregated with all other user data.

DeclineAccept